Learn how to snatch in 9 Easy Steps
One of the most important aspects behind teaching a progression is the goal of getting the athlete to understand the technique. When someone first starts beginning and learning to snatch they have zero clue of what goes into it. This means we have to keep it as simple as we can. We also have to make it really repetitive so when the athlete comes in to snatch when we repeat the progression again over months of training they gradually get a lot of reps in and begin to have “Aha!” moments around technique.

Let’s jump into how we do it here at Garage Strength!
1. Establish Snatch Grip
This is the first key factor: establish the snatch grip. Ideally, we can use a PVC pipe of a dow rod. We eventually want to advance to a bar, but there isn’t a rush. We want to look for the bar to sit right into the hip crease. We can start with the bar in the hands and widen the hands out until the bar gets into the hip crease.
A second thing that can be done, and a little ridiculous, is to put two fists over the lifter’s head and see if the bar sits there over the head. This is a little bit of a cheat. Widen the grip until the bar sits on the two fists.
Some coaches spend ten to fifteen minutes doing this. Don’t do that. Just put the bar in the athlete’s hands. Don’t spend too much on this. A third way to establish the grip, especially with large groups of athletes, is to just tell them to put their ring fingers on the rings and then adjust from there.
2. Standing Snatch Presses
Learning technique is best learned from a top-down perspective.
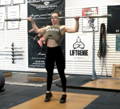
So with the snatch grip established, have the athlete put the bar overhead. In this position, we will have the athlete perform the standing snatch press for two to three sets of five to ten reps. We do this because we want to trigger the catch positions. We want the athlete to understand that when they are catching what their shoulders need to do. What ends up happening, if the athlete has the mobility, the bar will go exactly where it needs to be when they press and go overhead.
3. Overhead Squats
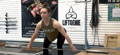
With the standing snatch presses completed, we will then have the athlete widen their feet slightly to where the feet will slide to in the catch of the full movement. We then have the athlete perform overhead squats for two to three sets of five to ten reps.
The whole goal here, especially dealing with newbies and younger kids, is that we want to make sure the athletes are squeezing in the shoulders and still have the tension they had when performing the snatch presses. The bar should not be drifting forward. Athletes need to squeeze the spine, utilizing their scaps, rhomboids, and rear delts.
It is also good to remind athletes to initiate the squat knees going forward and the butt going back at the exact same time.

4. Snatch Balances
The key concept behind the snatch balance is driving up and change direction to drive down. More athletic athletes will demonstrate their athleticism by dropping right away. More likely athletes will drive up, change direction, and catch the bar in a quarter squat. This is fine for people learning the movement to catch in the quarter squat and then ride the movement down into the hole.
The big thing is teaching athletes to understand the change of direction, coordinating the finish into the catch.
5. Muscle Snatch From Hip Into Overhead Squat
Athletes won’t know what a muscle snatch is. Don’t worry, keep it simple. Tell them the hips come through, stay up on the toes, and rotate the implement into position. This movement also gets the athlete into the plantarflexed ankles.
A key aspect behind the muscle snatch is it makes it easy for the athletes to feel the turnover in the shoulders. The turnover in the shoulders allows the athlete to then get down into the overhead squat.
This can be done two or three times for three reps.
6. Power Snatch From Hip Into Overhead Squat
Now we will use the same position but perform a power snatch instead of a muscle snatch. Athletes will now begin to learn the pull into a change of direction. At this point, if the athlete is athletic enough or aware enough, we can start cueing the feet sliding out. We don’t want their feet jumping all over the place. We want ground contact.
This can be done for three or four sets of multiple reps.
7. Hip Snatch
Time to perform a variation of the full movement.
When we bring in new athletes, we might spend thirty to forty minutes every single day for a month honing in on snatch technique. We find that the sooner we have athletes performing the full lift, the quicker they start to adjust and learn because they become more coordinated and aware of what is going on.
Have athletes perform four sets of three reps.

8. Pause Below The Knee & Above The Knee
From this point, we now progress to the next concept. We like to teach how the knees move but newbies and beginners don’t understand how the knees move. So one thing we like to do is use isometric muscular action. For instance, as we teach the full lift, we will have the athletes pause just below the knee with the knees back a little more, come over the knees and pause above the knee and then come back into the hip position. The idea is to force them to pause at positions to become more familiar with proper techniques.
Speed will come. From the hip, lower the bar down to where it would be hovering over the ground as if plates were on it. Then have the athlete pull to just below the knee and pause for a solid three count. The knees come through and the athlete now pauses just above the knees for a solid three count. After this pause, they complete the rest of the lift, pulling into the hip, receiving overhead as the body changes direction, and finishing by standing the lift up.

This variation of the lift can be performed for three sets of three reps. The movement is now starting to look like a full lift. This brings us to the next point.
9. Full Lift
We will actually have athletes do the full lift on the first day. We love the pauses because it lets the athletes feel the positions and begin to become aware of where their body should be. The beauty of having athletes perform the movement the first day helps develop interest.
Just remember, it won’t be perfect. We want to put athletes right into the fire so they can slowly understand. And no way are they maxing out this day or even the first month or potentially the first year. The point being, the sooner the athlete starts doing the full lift the sooner they start to learn the necessary technical principles.
Recap
Understand the global perspective. We want to educate athletes from a top-down perspective. Keep it easy! Establish a grip, ignite the shoulders into the catch position, learn how to utilize the hips properly, use the pauses to teach the athlete as effectively as possible, and realize the full lift needs to be performed the first day, even if it is with a PVC pipe. The key is doing it over and over again.

DANE MILLER
Dane Miller is the owner and founder of Garage Strength Sports Performance. He works with a select handful of clients on building comprehensive programs for fitness and nutrition. Several times a year he leads a workshop for coaches, trainers, and fitness enthusiasts.
Join the Community
Thank you for reading, watching, commenting, sharing, and spreading all of our information around the web. Want more information like this? Become a part of the journey on Twitter, Facebook, Instagram and YouTube!