Clean and Jerk Tips | The Jerk Step By Step
Many people have issues when it comes to performing the split jerk. Athletes be like, “What should my grip width be? What should my foot width be? What should I do when I’m dipping? What should I be doing when I’m in the split?” A lot of weightlifting might struggle with the answers to these questions.

Let’s dive into all of these different issues and offer solutions.
1. Establish A Clean Grip
The first thing is establishing the grip for the split jerk. The good thing is the split jerk grip position is the same as the clean grip. The way we establish a clean trick is by putting the crook of the elbow on the outside of the knees.

The jerk position grip is defined by the clean grip. There is the possibility of the grip being moved out slightly due to mobility.
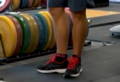
2. Establish Foot Position
The next thing we want to focus on is to go one foot width wide to establish the foot positions to dip during the split jerk.
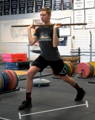
3. Establish Split
Ideally, when we get into teaching an athlete how to split jerk, we want to go over the clean grip, the position when they’re dipping, and go right into the position athletes end up into with the split. The reason we do this is that we want to start with the end position. We might do this from the end position to work backward. We do this as a little trigger to get them to start becoming aware of the body positions.

With the split, we want to see them split wider than their dip position. So athletes will go as wide as they are with their front squat position or with their clean catch. A simple trick is to go one to one and a half foot length forward and back. We recommend no longer than a foot and a half forward and a foot and a half back, specific to the athlete.
Establish this split position. This is the end goal and where we want to be with the athlete.
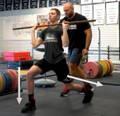
4. Press In The Split
Once we have the split position established, the next thing we are going to do is have the athlete press in the split. The reason why we have athletes press in the split is that we want them to get comfortable absorbing energy. We don’t want to see too much bouncing from their hips. We want athletes to be stable and feel stable. We want the back heel out and the front foot almost driving in with their energy as they press from the split.
The athlete now knows what the end goal is. They know the grip, they know the dip width, and how long they will be splitting. All of these things need to be established early on so they can see the end goal. And that leads into the rest of the progression.
5. Trigger A Dip
Let’s go ahead and warm up the shoulders. Have the athlete just do a press. This is used to wake up the shoulders. This can be done with an empty bar but with beginners, a dowel bar or PVC pipe works fine. The athlete is now good to trigger the dip.
We trigger our athletes with the dip by telling them to stay upright, push the belly button forward, and the spine back. This creates a rigid foundation for a vertical dip. If the athlete goes forward, start to cue and fix that.
6. Chun Push Press
What we want to see now is a vertical dip into a push press. We have athletes do a movement we call a Chun push press. What we want to see is a dip and drive with a hold on the toes to help trigger a long drive.
Pay attention to athletes’ natural dip. Some may dip too deep and some may deep too short. Most have a decent dip naturally. Tell the athletes to dip, drive, hold on the toes. It is a balance. We recommend the dip around 6-8”, similar to where an athlete needs to be in a counter-movement for a vertical jump.
7. Traditional Push Press
This is exactly what it sounds like. We want the athlete to dip and drive and bring the heels back down to the ground. The Chun push press is actually a little bit more complicated. We really want to focus on teaching a long, linear drive.

8. Power Jerk
The whole goal now is to teach the athlete how to change direction. It is a drive into a drop. Feel free to slow it down.

Now instead of going right into the power jerk, we can have athletes perform a push press into moving their feet. The athlete will push press, hold it for a beat, move their feet out to the front squat stance, and then change direction and drop. Then we go into a true power jerk.
Remember: change of direction–drive, drop!
We need the athlete to be stable in the catch. Athletes need to focus on squeezing through the upper back, lighting up the traps, the rhomboids, the rear delts.
9. Split Jerk
Here we get a little bit more complicated.
The thing is, we want to focus on a good dip, a vertical dip and drive, the change of direction, and all of a sudden, we are back to the beginning. Remember, we said to teach the end first. The front foot recovers first, then the back foot.
Any athlete who has trouble learning the split jerk position, pause in the split position with the barbell overhead for ten seconds. Hold the back heel up, hold the front foot, squeeze through the entire body, and then recover the front foot followed by the back foot.
Recap
Establish the grip, establish the foot width, and establish the split position right away. Establish that the split position is the end goal. Cue the beginner athlete over and over again that the split position is the end goal. From there, keep it simple.
Work through this progression multiple times. At Garage Strength, we go through this whole progression the first day. We then do it over and over and over again. The big factor is to not waste time. Jump right into it and try to hone in on the specific technical work needed.

DANE MILLER
Dane Miller is the owner and founder of Garage Strength Sports Performance. He works with a select handful of clients on building comprehensive programs for fitness and nutrition. Several times a year he leads a workshop for coaches, trainers, and fitness enthusiasts.
Join the Community
Thank you for reading, watching, commenting, sharing, and spreading all of our information around the web. Want more information like this? Become a part of the journey on Twitter, Facebook, Instagram and YouTube!