Front And Center: Why Zercher Squats SUCK And Have No Business Being In Your Training
Squats rule. There are no mincing words about it. When it comes to a full range of motion, compound movement exercise where a crap ton of intensity needs to be used to develop leg strength for speed, mass, and impulse, the squat takes the blue ribbon, best in show, gold medal accolades back home.
The squat also serves as an excellent trunk workout. By trunk, I mean the core, the abs, the obliques, and the lower back. Most of the musculature that helps keep the torso erect. Because the squat is so superb at working the trunk, abs, and core, it contributes wonderfully to gaining six pack abs and developing the Garage Strength favorite, dynamic trunk control–DTC for short.
Is there anything the squat doesn’t do?!?!
The squat is so effective, it is used nearly daily in many Olympic weightlifting programs and is used routinely in Garage Strength Program Design and our strength training app designed with athletes in mind, Peak Strength.
But are all versions of the squat created equal?
Squat Derivatives
The squat rules. It rules so much it can be done in a variety of ways to create variation within the movement and elicit various training responses for physical adaptations.
The list of squat variations and derivatives is immense. I am personally a fan of the back squat, the front squat, and the single leg squat as the big three.
I like the back squat because it allows for such a heavy load in a bilateral position. It develops immense absolute strength and puts the body under extensive tension. The back squat also invites a full range of motion, ass to grass mobility routine within its strengthening of the body.
I like the front squat for similar reasons. The front squat allows for a pretty substantial load (not as much as the back squat), helps improve the clean, and is a nice gloss for upper back mobility. Besides benefits of mobility and leg strength, the front squat strengthens the core and builds a thiccc upper back. It is also a bilateral movement that crushes the quads and builds up that anterior sequence of musculature.

I like the single leg squat because it is a unilateral movement that can be performed with a substantial load. The single leg squat requires balance, bravery, and balls. Loading a barbell with substantial weight and placing your foot back on a single leg roller is no laughing matter. Performing the movement fires up the hamstrings and adds shelf room to the glutes. And there is no such thing as a one rep on a single leg squat because you always have to do the other leg.

Those are my three favorite squat derivatives. Of course, all three of them can be varied in numerous ways. I can turn the front squat into a zombie squat. I can turn the back squat into a box squat. I can perform the single leg squats with a timed eccentric or do them in an unbroken pattern. I can change the reps and sets with each, or I can add pauses. I can even add double bounces. The variations and combinations of modulators becomes pretty robust if taken out to a logical conclusion.
But there is one squat I don’t use and don’t like and believe it has no business being in your training…unless.
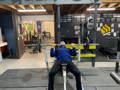
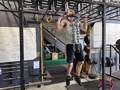
Zercher Squat
The Zercher Squat, and its derivative exercises, are named after Ed Zercher dating back almost a century ago to the 1930s. He invented the Zercher squat out of necessity. The gym the dude worked out at did not have a squat rack and the Steinborn Squat was apparently not part of his repertoire. Information didn’t travel quite the way it does today.
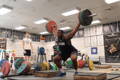
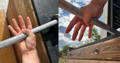
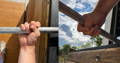
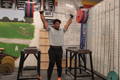
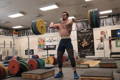
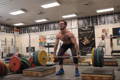
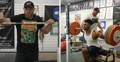
Eddie Zercher would wedge his elbows into the crook of the bar and deadlift the bar up. From the completed deadlift position, he would then squat down holding the barbell in the crook of his arms, with a wicked flex in his biceps, as he squatted down with the front-loaded barbell.
Talk about a compound movement! Mr. Zercher, strong man extraordinaire, had to deadlift the bar before he could even squat it! Got to love technology, sure makes things easier, safer, and able to train at heavier and heavier loads–I’m going to remember this next time I gaze upon a squat rack and count my lucky stars what such an overlooked device has done for fitness and health the world over.
Makes me think about having to clean the bar to perform a front squat. Or even more demanding–having to clean the bar, jerk the bar, and then lower the bar to the back to perform a back squat. At least I wouldn’t have to jerk the bar to full lock out, but only get it high enough to clear my head and onto my back. But something about all that movement feels prone for disaster and putting a limiter on the amount of weight that can be used.
We in the contemporary world are lucky that we don’t have to perform a Zercher Deadlift before we can even perform a Zercher Squat (or a clean for that matter). We get to use a squat rack or jerk blocks.

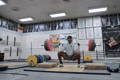
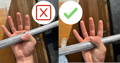
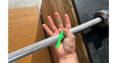
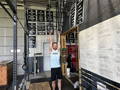
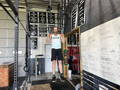
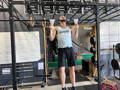
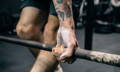
I like to put the J-hooks in the squat rack to a height that is between the naval and the bottom of the pecs. Ideally, the J-hooks height will line up with the bottom of the sternum. For me, this puts the bar right around where if I flex my biceps, my elbows will hug the barbell and put me in a prime position to perform the Zercher Squat.

But I need to go back to being uncomfortable with the weight lodged in the crease of the elbows. I feel like at any moment, especially with any type of significant load, my biceps are going to tear from the deep muscle tissue work and compounded strain of holding a bent arm position.
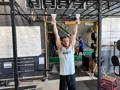
Fortunately, my biceps have never torn while doing a Zercher Squat. I’ve been bold enough to max the lift out back in exuberant CrossFit days when I wanted to change things up. Looked like something to try. Thankfully my biceps came out unscathed, my elbows maintaining function, and my legs and upper back stronger.
Now my back did round while performing the movement. For many, a rounder back is a big no-no and is a sure-fire way to cause injury. However, a rounded back occurs quite frequently and quite often in the realm of sporting competition.
That’s where performing the Zercher Squat comes into play.

Benefits To Athletes
What’s cool here is the Zercher Squat has tons of benefits:
- Upper Back Strength: I think the front squat does wonders for the upper back and thoracic area (which it does), but the demands the Zercher Squat makes of the upper back makes the front squat look like a kid’s game
- Quad Strength: To perform the Zercher squat with any success, the posture of the body needs to be upright. This upright posture ends up creating more knee flexion, which in turn spotlights the quads of the anterior sequence when standing the weight back up.
- Dynamic Trunk Control: The need for a neutral spine is important in all things squatting, but the Zercher Squat challenges the abdominal muscles and lower back muscles of the trunk to a substantial degree.
- Postural Integrity: the Zercher Squat is front loaded, which takes the weight off the back and off the spine which alleviates direct pressure upon the spine. However, it does switch up the movement arm based on where the weight is held.
In addition, the Zercher Squat brings in that real world, functional strength component. Because let’s face it, the sports performance area and lifting weights is done by most athletes to transfer over to their sport.
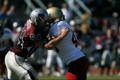
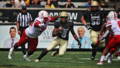
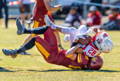
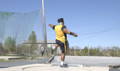
The football player squats to not get pushed around by the opponent and to run faster. The shot putter bench presses to launch their implement further. The swimmer does high rep pull ups, so their lats are stronger for longer in the pool. The powerlifter squats to…you get the picture.
This is where the Zercher Squat shines. The exercise puts the entirety of the body into use in a unique way. I don’t know about you, but oftentimes I need to pick something up in my arms, keep my arms bent, round my back, and squat down. It is functional. It is necessary. It is why Ed Zercher developed the Zercher Squat the way he did. The movement makes sense around how to pick something up and then squat it!
And it isn’t like the Zercher Squat doesn’t benefit athletes because it does.
Who Should Use It
Everyone can use the Zercher Squat and benefit from how it challenges the body. However, combat athletes the world over should use it more than any other.
Why?
Because the Zercher Squat incorporates the upper limbs in an idiosyncratic way that mimics a clinch, an underhook, a bear hug, or the general position used for a throw, a trip, or something of that sort it has viability in training.
Wrestlers, Judo, BJJ, and other combat sport athletes understand the benefits of the Zercher Squat. The exercise is a legit exercise to be selected in their training programs and transfers well to their sporting needs.
You know who else should use Zercher Squats?
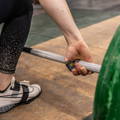
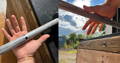
First responders, military personnel, and, this one may not be as obvious, people who ruck. The Zercher Squat position, namely the bent elbow and front loaded, is that classic, lifesaving body drag, to get the wounded to safety as quickly as possible.

But why rucking? How does the Zercher Squat help people who ruck? The answer is rather straightforward–the gained upper back strength from where the movement arm exists. The weight being carried in the crook of the elbow places the load around the sternum, kind of similar to a camber bar, only way more demands are placed on the upper back to keep the weight there. The added upper back demands help with the postural demands that come with rucking.
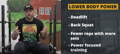
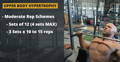
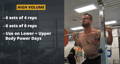
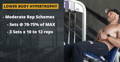
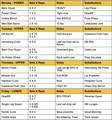
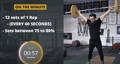
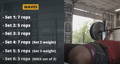
Sample Lower Body Power Workout (Zercher Heavy)


The Bottom Line
The Zercher Squat is a movement created out of necessity. The tech either didn’t exist yet or wasn’t in possession yet, and human practicality and creativity stepped in to solve the need for stronger, leaner, more athletically capable legs. The Zercher Squat exercise has been with us ever since.
Where the movement has its drawbacks, it also has strong proponents in the world of first responders, combat athletes, and ruck runners. Rightfully so! The Zercher Squat is a challenging movement that builds leg strength and creates unrivaled upper back strength. It also serves as quite the functional movement in regard to tech deprived practicality.
So, if you’re an athlete looking to train using the Zercher Squat, or any squat for that matter, head over to peakstrength.app and download Peak Strength our strength training app developed with athletes in mind so you can reap the benefits of the Zercher Squats and over 700+ exercises.
Later.


EARL KUNKEL
3x World Champion Co-Author of the Year
King of the PA Press
Individualized Training App

Get elite level strength programming with
PEAK STRENGTH
Blog Topics
Yo, It's Dane
Welcome to the Garage Strength Blog, where it is my goal to provide you with the experience and knowledge I've gained in the strength and conditioning world over many years of learning from both successes and failures. I train elite-level athletes in a multitude of sports from the high school to professional levels, already producing 5 Olympics and 30+ National Champions. If you want to be the next champion I train, check out my strength programs below!
Start Training With Me

Join for free educational videos EVERY WEEK on strength coaching and athletic performance